Monday, November 1, 2010

Meaty Grilled Vegetable Lasagna


This lasagna is crazy good!

Any (and all) of these things are delicious on their own...

Grilled zucchini.
Spicy Italian sausage.
Cheese.
Late summer tomato sauce.
Sauteed spinach.
Cheese.
Sauteed mushrooms.
Caramelized onions.

All together? Baked till bubbly? Wow....YUM!

Here's how you can make it.

Ingredients:

1 pound good quality ground beef, browned
1 pound hot (or not) Italian sausage, browned and drained
8 oz mushrooms, sliced and sauteed with olive oil (I used baby bellas)
1 pound No-boil lasagne noodles (you won't need them all)
32 oz tomato sauce (I used my homemade tomato basil sauce...any good jarred sauce could work)
1 package of baby spinach, sauteed with olive oil then drained
3 onions, sliced and carmelized
4-5 medium zucchini (or summer squash) sliced longways and grilled
mozzarella cheese
ricotta cheese (I mixed in chopped basil just to gild the lily)

Ok, so I'm going to do my best to recreate the recipe here. I tend to cook on the fly, adding and omitting ingredients at the drop of a hat. It's what I do. Can't help it. I've been a professional chef for over a decade, but that doesn't mean I can actually take pen to paper (finger to keyboard) and write a recipe exactly the same way. Pretty darn close...

If you know your way around a kitchen, I think you'll catch my drift with this recipe. Sorry that I don't explain every step. But it is so good!

It seems like a lot of adavnce prep (and it is) but here's how you can think like a chef. Many of these things make excellent ingredients for other meals in your weekly meal planning. Caramelized onions? I do them by the VAT. They are so handy and pack a savory flavor punch! They are amazing on pizza, in sandwiches, sprinkled on a salad with crumbled blue cheese, mixed into mashed potatoes, topping a burger, and let's not forget to mention eaten on a piece of torn baguette while standing at the stove, cooking your family a meaty lasagne. What else could you make extra of? Well, you could cook extra beef and use it for tacos the next day. You get the idea.

But back to the lasagna...

1. Once the onions have been caramelized, the zucchini has been grilled, the meats have been browned, the spinach and mushrooms have been sauteed bring out all the other players in your lasagna construction. I like to use the set of glass prep bowls I've had for ages, but your kids cereal bowls also make great places to hold the prepped ingredients. Hey, your mis-en-place is ready! (That's fancy chef-talk for having your ingredients ready to go right in front of you).

2. Start building your lasagna. I assume by this point you have brought out your big baking dish, suitably deep. I use my big pyrex baker, but you can use any big oven safe dish...especially if your mom is coming to dinner and you want to bring the dish to the table for a nice wow factor. Remember, you can keep stacking and go as high as you want with this meaty stack of vegetables and noodles as long as it won't go over the side. Only have a cookie sheet? Get thee to the store! Big pyrex dish? Let's get cookin'!

3. I start with a layer of sauce and the ground beef. Next comes a layer of noodles. Ricotta. Sauce. Zucchini. Onions. Noodles. Mushrooms. Spinach. Noodles. Zucchini. Sausage. Sauce. Ricotta. Sauce. Mozzarella. I plopped the extra ricotta I had on top with the mozzarella. You could if you want. If you used all the ricotta in the earlier layers, don't sweat it.

4. Everything in? Pop it in the oven at 350 for about an hour. You'll know it is ready when the cheese is lightly browned and melted and the sauce is bubbling up. Be sure to let it cool down before you dig in, at least 15 minutes. Believe me, it will stay very hot in that dish. Go ahead, make a salad. Take a break. Dinner is ready, it is delicious and hopefully you'll have leftovers.

Friday, October 29, 2010

Chicken Marbella...is anything yummier?


This is my go to recipe for a crowd. It couldn't be easier and it packs a lot of flavor. Plus, it's even better the next day or served at room temperature.

What? Something that doesn't need last minute attention?? Hello, dinner party favorite! For this reason, when I catered my own rehearsal dinner (crazy I know) I made chicken marbella.

I substitute boneless chicken breasts, and make a mix of green and black kalamata olives. I also throw in some extra prunes...so tasty!

I cannot thank the Silver Palate enough for this amazing dinner party standard, which I located on epicurious.com to put here. My comments are in red.

Ingredients:

4 chickens, 2 1/2 pounds each, quartered **I use boneless breasts**
1 head of garlic, peeled and finely pureed
1/4 cup dried oregano
**or more**
coarse salt and freshly ground black pepper to taste
1/2 cup red wine vinegar
**I use balsamic**
1/2 cup olive oil
1 cup pitted prunes
**chopped**
1/2 cup pitted Spanish green olives
1/2 cup capers with a bit of juice
6 bay leaves
1 cup brown sugar
**I half that amount**
1 cup white wine
1/4 cup Italian parsley or fresh coriander (cilantro), finely chopped
**I use parsley and fresh oregano**

In a large bowl combine chicken quarters, garlic, oregano, pepper and coarse salt to taste, vinegar, olive oil, prunes, olives, capers and juice, and bay leaves. Cover and let marinate, refrigerated, overnight.
**very important!**

Preheat oven to 350 degrees.

Arrange chicken in a single layer in one or two large, shallow baking pans and spoon marinade over it evenly. Sprinkle chicken pieces with brown sugar and pour white wine around them.

Bake for 50 minutes to 1 hour, basting frequently with pan juices. Chicken is done when thigh pieces, pricked with a fork at their thickest, yield clear yellow (rather than pink) juice.
**less time with boneless breasts...check them at 35 mins**

With a slotted spoon transfer chicken, prunes, olives and capers to a serving platter. Moisten with a few spoonfuls of pan juices and sprinkle generously with parsley or cilantro. Pass remaining pan juices in a sauceboat.

To serve Chicken Marbella cold, cool to room temperature in cooking juices before transferring to a serving platter. If chicken has been covered and refrigerated, allow it to return to room temperature before serving. Spoon some of the reserved juices over chicken.

Spider Oreos


Much to the delight of my four year old, I made these spider oreos for his preschool halloween party. They are surprisingly easy to make, and a big hit.
Here's how to do it...


To make them, you'll need oreos (or some other sandwich cookie) and material for arms and legs. Here is what I used:

- pretzel sticks (halved)
- cinnamon drop eyes (for the kiddos I used white chocolate chips)
- store bought frosting (Hey, I already had some in the fridge)
- Oreos
- food coloring

1. Twist off apart the oreos, scrape the creme into a medium bowl. Set the cookies aside. Mix frosting into the creme to bulk up the filling. **I made about 16 oreo spiders and added about 1/2 cup of frosting** In order to make the mixture easier to work with, toss it in the microwave for about 20 seconds. Stir in food coloring if desired. I made my spider creme orange.

2. Take bottom half of oreo. Pipe in about 2x-3x the usual amount of filling. You're building a bed thick enough to hold the "legs" in place. No piping bag? No sweat. You can put it in a ziplock baggie, nip the corner of the bag with scissors and squeeze gently. You'll get the job done.

3. Put on the legs. As any budding young entomologist will tell you, spiders have 8 legs. I used 1/2 pretzel sticks, but you could use any edible leg material like licorice.

4. Stick on the top cookie. Press gently but firmly. You might break one or two until you get the hang of it...I did!

5. Time for eyes! Use a dab of the creme filling to secure the eyes of your choice to the top of the cookie.

6. Enjoy! They are best enjoyed the same day.

Thursday, August 26, 2010

Summer Berry Crisp


Summer berry crisp


I made this crisp to show off the raspberries and blueberries I found at the farm stand. This not too sweet crisp calls out for a rich scoop of vanilla ice cream. Best part is, any berries will work in this crisp.

filling:
2 pints blueberries
2 half-pints raspberries
1 pound strawberries, sliced
1/2 cup flour
1/4 cup sugar
zest from one lemon (optional)

crumb:
1 cup flour
1 1/2 cups oats
3/4 cup brown sugar
7 T butter
ground ginger
ground cinnamon
ground nutmeg

In a large bowl, combine the berries with the sugar and flour and zest. Be careful not to smoosh the berries. Set filling aside.

In a medium bowl (or food processor) combine butter, oats, spices and flour. I like it oaty, so I usually add a little more oats. Mix until it gets clumpy, and it sticks together when pressed between your finger tips. Top the filling with crumb.

Bake for 45-60 minutes at 350, or until it is bubbly around the edges.

If you do not have fresh berries on hand, you can use frozen berries right from the freezer and it will still be delicious! Use enough berries to fill your dish, I use a medium sized baker. If your dish is too big, you will need more crumb to cover all the filling. Another variation is to make individual crisps.

Monday, August 16, 2010

Corn Chowder


Oh how we love sweet corn from the farm!

Once I tire of all those delicious cobs of fresh, sweet corn dripping with butter and salt it's time to add a little variation to the dining table. Corn salad? Corn salsa? Corn Chowder? Hmm. Time to find a recipe, but I need to keep it meat-free for my vegetarian friends.

I found a promising recipe on the New York Times website, and I gave it a read. Now, I was skeptical that I wouldn't like a chowder that banishes bacon and has a light touch of cream but this corn chowder is amazing! I grilled the corn first and I think that adds a nice touch. I also skipped the micro greens, and sprinkled scallions from my garden on top instead.

From the New York Times Diner's Journal:

Corn Chowder

Yield 4 servings

Time 1 1/2 hours

Ingredients
  • 2 onions, diced
  • 4 tablespoons unsalted butter or olive oil
  • 6 ears of corn
  • 1/2 cup heavy cream
  • 2 teaspoons salt
  • freshly ground black pepper
  • 4 sprigs micro greens, like pea shoots, for garnish.
Method
  • 1. Using a sharp knife, cut the kernels off the ears of corn and set aside, reserving the cobs. In a large saucepan, combine the cobs, 1 of the diced onions, and 8 cups water.
  • Place over high heat to bring to a boil, then reduce heat to medium. Cover and cook for 20 minutes. Turn off heat and allow to steep for an additional 30 minutes.
  • 2. While the corncobs are steeping, place a large saucepan over medium-low heat, and add butter or olive oil. Add remaining diced onion and sauté until translucent and soft, about 20 minutes; do not allow to take on any color. Add corn kernels and sauté until slightly translucent, about 5 minutes. Remove from heat and set aside.
  • 3. When the stock has finished steeping, strain it, discarding the cobs and onions. Add 6 cups to the pot of corn kernels; discard any remaining stock or reserve for another use. Return to medium heat and simmer until the corn is soft, about 2 minutes. Add heavy cream, reduce heat to low, and cook for 15 minutes.
  • 4. Remove half the soup and allow to cool until no longer steaming when stirred. Hot soup cannot be puréed in a blender, because the aeration makes the top blow off, and the hot soup spews all over. Working in batches, purée the soup in a blender until kernels are partly broken, or smooth, depending on your preference, then return to pot, reheating gently if necessary. Season with salt and a few grinds of black pepper. Divide among four bowls, and garnish with micro greens.

Source: Adapted from Patricia Williams, executive chef, Smoke Jazz & Supper Club-Lounge

Lemon Raspberry Bars


Tart and delicious!

I have made these lemon raspberry bars over and over. A perfect finish to a summertime meal. Yum! Adding zest to the graham cracker crust makes it zing.

Wednesday, July 28, 2010

Grilled asaparagus

Grilled asparagus. Salt, pepper, sprinkle of olive oil...done. Don't go crazy and squeeze on some lemon, or sprinkle some fresh herbs on top. Ok, maybe you can do that.

Friday, July 16, 2010


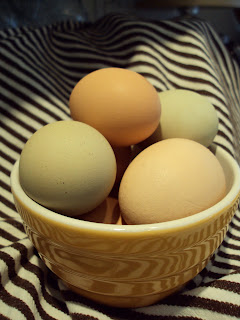
Fresh eggs from the henhouse this morning.

Perfection is a poached fresh egg.

Monday, July 12, 2010

Mmm. Cinnamon rolls!

One morning, I just HAD to make these cinnamon rolls.

I used Paula Deen's recipe from Food Network. They were yummy, though the glaze was more thin and sugary than the thick gooey mess I was hoping for. I'd skip the glaze and make a thicker gooey one. The rolls themselves were amazing!

Here is Paula Deen's recipe from foodnetwork.com:

Ingredients

Dough:

  • 1/4-ounce package yeast
  • 1/2 cup warm water
  • 1/2 cup scalded milk
  • 1/4 cup sugar
  • 1/3 cup butter or shortening
  • 1 teaspoon salt
  • 1 egg
  • 3 1/2 to 4 cups all-purpose flour

Filling:

  • 1/2 cup melted butter, plus more for pan
  • 3/4 cup sugar, plus more for pan
  • 2 tablespoons ground cinnamon
  • 3/4 cup raisins, walnuts, or pecans, optional

Glaze:

  • 4 tablespoons butter
  • 2 cups powdered sugar
  • 1 teaspoon vanilla extract
  • 3 to 6 tablespoons hot water

Directions

Heat oven to 350 degrees F.

In a small bowl, dissolve yeast in warm water and set aside. In a large bowl mix milk, sugar, melted butter, salt and egg. Add 2 cups of flour and mix until smooth. Add yeast mixture. Mix in remaining flour until dough is easy to handle. Knead dough on lightly floured surface for 5 to 10 minutes. Place in well-greased bowl, cover and let rise until doubled in size, usually 1 to 1 1/2 hours.

When doubled in size, punch down dough. Roll out on a floured surface into a 15 by 9-inch rectangle. Spread melted butter all over dough. Mix sugar and cinnamon and sprinkle over buttered dough. Sprinkle with walnuts, pecans, or raisins if desired. Beginning at the 15-inch side, role up dough and pinch edge together to seal. Cut into 12 to 15 slices.

Coat the bottom of baking pan with butter and sprinkle with sugar. Place cinnamon roll slices close together in the pan and let rise until dough is doubled, about 45 minutes. Bake for about 30 minutes or until nicely browned.

Meanwhile, mix butter, powdered sugar, and vanilla. Add hot water 1 tablespoon at a time until the glaze reaches desired consistency. Spread over slightly cooled rolls.

http://www.foodnetwork.com/recipes/paula-deen/cinnamon-rolls-recipe/index.html

Sunday, July 11, 2010

Lettuce in the garden...
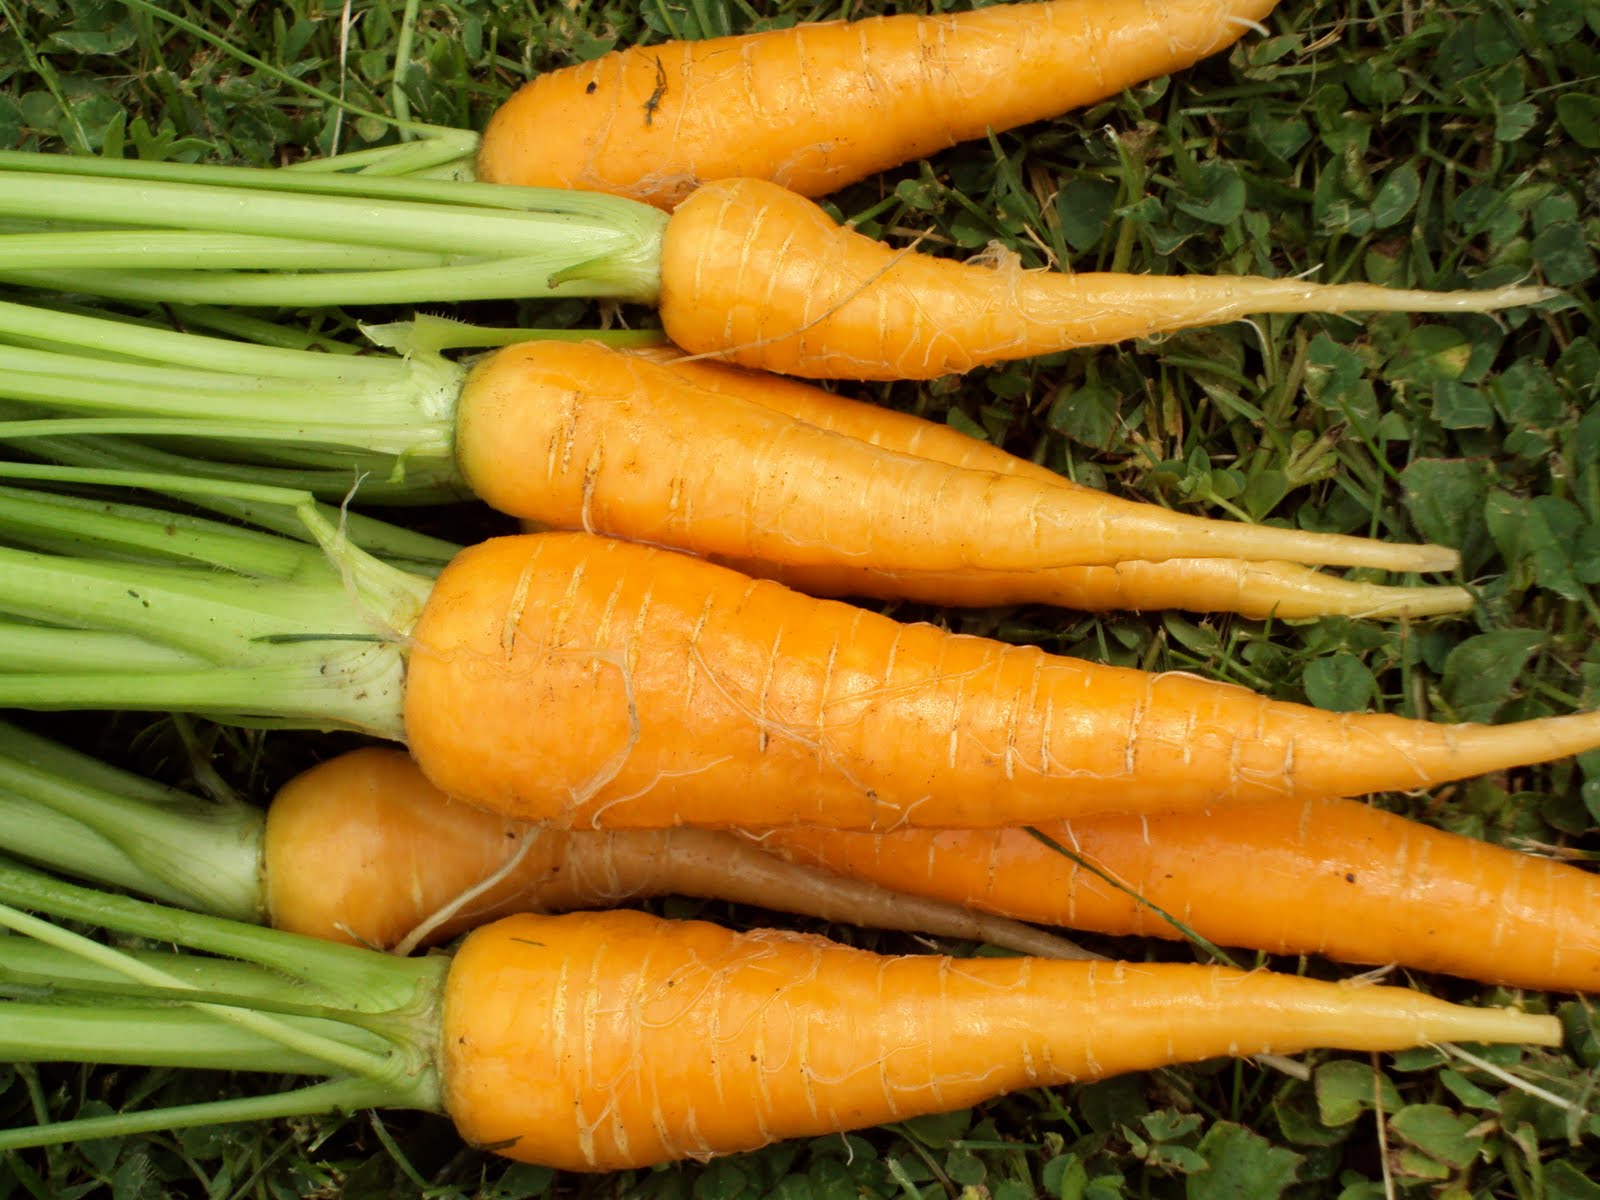
Super fresh carrots, pulled from the ground.
Snap peas on the way...
Broccoli...and then the long wait for delicious summer tomatoes...

I planted four vegetable gardens this year. They are filled with herbs, fruits and vegetables. Makes for some good eating.


Fresh picked sweet strawberries. Most of these ended up in a tart rhubarb strawberry crisp. See the posting under berry crisp for the recipe for the crumb top. Substitute the rhubarb and the strawberries for the berries and you'r egood to go.

Red Cabbage and Fennel Slaw


Red cabb
age. Destined for a slaw with fresh shaved fennel. I used a recipe on foodnetwork.com by Melissa d'Arabian. Yum! Serves 4.

Ingredients

  • 1 fennel bulb, core removed, cut into quarters, and sliced very thinly, fronds reserved
  • 1 cup thinly sliced purple cabbage
  • 2 scallions, chopped
  • 2 strips bacon, cooked crisp and chopped

For the dressing:

  • 1/4 cup mayonnaise
  • 3 tablespoons red wine vinegar
  • 3 tablespoons chopped fennel fronds
  • 1 teaspoon sugar
  • Salt and freshly ground black pepper

Directions

Toss the fennel, cabbage, scallions, and bacon together in a medium bowl. Whisk the mayonnaise, vinegar, fennel fronds, sugar, and salt and pepper, to taste, in a small bowl. Add the dressing to the slaw and toss to coat.